Manual Adjustments
The Manual Adjustment function on the SLICE Desktop provides a mechanism for updating financial amounts held in SLICE. In fact, apart from source system accounting events, the Manual Adjustment screen is the only method of impacting account balances held in SLICE. In doing so it also provides appropriate control over the input, processing and reporting of adjustment journals.
Outline of the manual adjustment process
The steps in posting a journal can be summarised as:
- Create — the header is created and savd as work in progress. Journal lines are then added and all the required information included.
- Submit — on submission, SLICE validates and writes to an un-posted table in the database with a status of “Awaiting Authorisation” for a permanent journal. For a for a reversing journal the data is posted to the journal.
- Authorise — this must be done by a person other than the creator and applies to permanent manual adjustment only. The authorisation process revalidates the journal and writes to an un-posted table ready to be posted to the ledger following the date roll at the start of the overnight batch.
How to ...
The SLICE Desktop Manaul Adjustment tool (Madj) enables you to make single, one-off adjustments, as well as carry out bulk upload journal entries. There are also a number of other functions to ease the management of the manual adjustment process.
... make a single new manual adjustment
Before you begin make sure you have all the relevant information to hand. You will need as a minimum:
- the adjustment type
- the effective date, value and reversal date (if appropriate)
- the journal's associated source system
- prefered static
A single, or one-off, manual adjustment using the SLICE desktop is often quicker and more appropriate than using the bulk upload facility. The single, or one-off, adjustment is achieved by entering information directly into the rows and colums of the Manual Adjustment screen on the SLICE Desktop application.
To make a one-off manual adjustment:
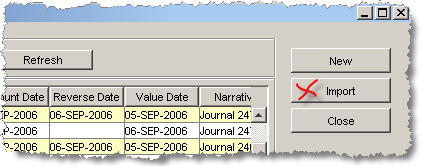
Click on the New button.
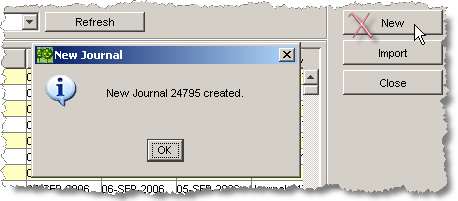
SLICE will create a new journal line at the top of the summary panel, as well as confirm the creation of the new Journal.
Working from left to right, complete each of the fields (or columns) in the new Journal Summary row.
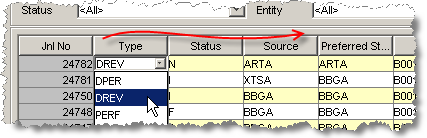
The reason for this is that many of the selections you make determine the options available in the fields downstream to the right. For instance, selecting adjustment type DREV (Daily Reversing) will enable the Reverse Date field.
Working from left to right, complete each of the fields (or columns) in the Journal Detail lines.
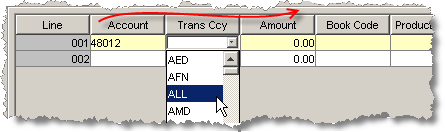
Again, the reason for this is that many of the selections you make determine the options available in the fields downstream to the right.
Click the Save button if you need to store the information you have entered.
Attention: Saving does not submit the Journal to the database but merely stores the information you have entered so far.
Click the Add Line button to create more lines if you need to.
You can add as many lines as you need to - there are no practical limits.
Click the Submit button when you have completed all the information required to make the adjustment.
Permanent adjustments will require authorisation and their status of the Journal will change to Awaiting Authorisation. Reversing adjustments will be commited to the database without requiring authorisation and the status will change to Processed.
... make a quick copy/reversal adjustment
To quickly copy, paste or reverse a journal:
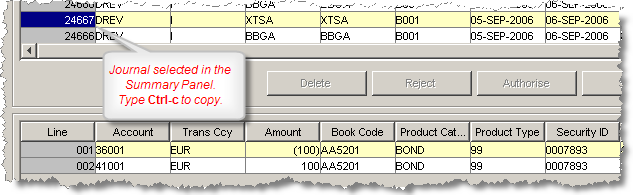
In the Journal Summary panel, select the journal you wish to copy or reverse.
Copy the Journal (CTRL-c).
For a reversal type CTRL-r. For a copy type CTRL-v.

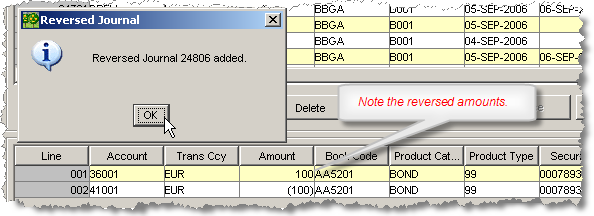
Once you confirm the reversal, the new journal is created with the details copied, and the amounts reversed if you specified a reversal.
... make bulk uploads
SLICE provides the facility to transfer the contents of a journal that has been completed in a MS Excel spreadsheet. The contents of this spreadsheet is uploaded to SLICE and validated in the same way that a single or free-format entry.
An Excel template is provided for the purpose. The information required for the spreadsheet is exactly the same as that required for free-form entry using the SLICE interface. However, the SLICE interface provides lookup dialogs to assist with the completion of journal details.
... create journal entries in excel
To create journal entries using the SLICE Manual Adjustments Excel Template
Locate and open the template: MADJ_Journal template
Click the Edit Header button.

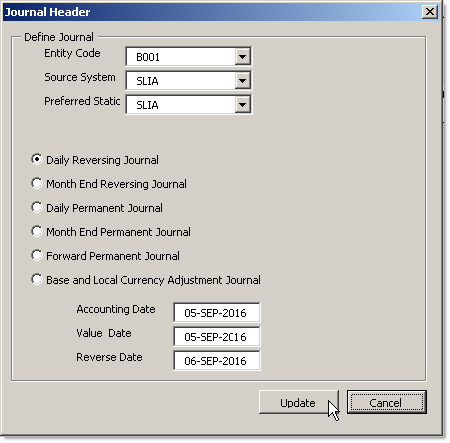
This button opens a dialog for entering header information.
Complete all required information in the Journal Header dialog and click the Update button.
Click on the Add Line button to create a new journal detail line.

The spreadsheet macro creates a new line:

You can add as many new lines as are required for the journal.
Enter information in all the fields for which you have details.
Once all information is entered, click on the Create File button.

The speasheet will prompt you for a file name.
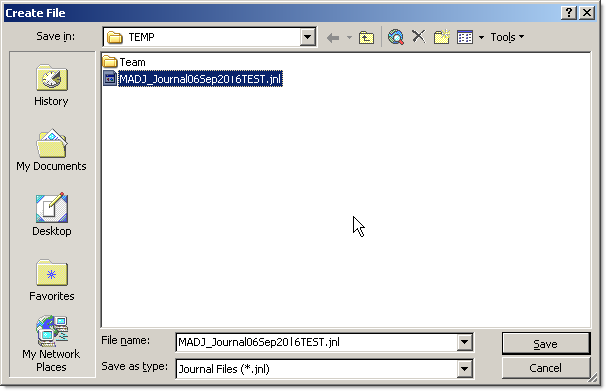
Enter the filename. The file type must be jnl.
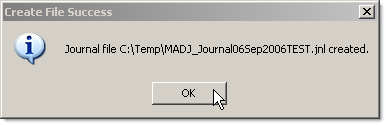
You will get confirmation of the new file and its location when it is created.
... upload bulk adjustments to SLICE
To use the Bulk Upload function you must first create a journal file using the SLICE Manual Adjustments Excel Template.
To upload a previously prepared journal file:
From the SLICE desktop, open the Manual Adjustemnts screen (ALT-J).
Click on the Upload button.
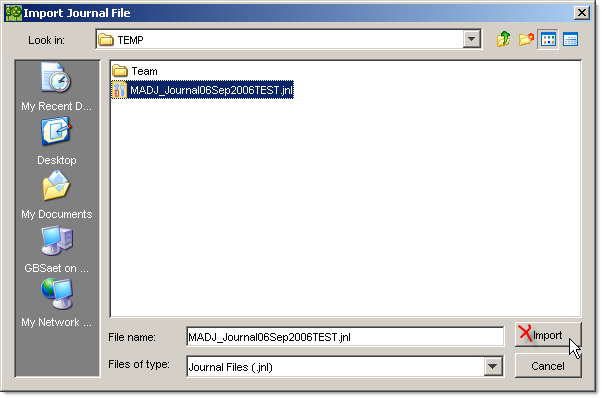
Using the Import Journal dialog, locate and select your previously prepared journal file and click Import button on the dialog
Validation occures when the journal is imported and you will get a message identifying where validation has failed.
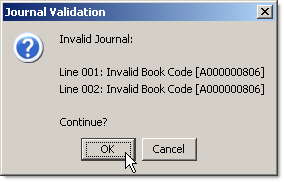
If you click OK to continue, the journal will be imported and you will be able to fix the validation problems using the SLICE Manual Adjustment interface. If you cancel, you will need to amend the journal in the Excel spreadsheet and re-save it before attempting to upload it again.
!!! note You will not be able to re-load the journal (jnl) file into the SLICE Manual Adjustment Template once you have closed the spreadsheet. If you wish to save the spreadsheet version of the journal for later use, you will need to use the File/Save As . . menu option in the spreadsheet.
... authorise or reject a manual adjustment
All Permanent adjustments must be authorised by a supervisor before they can be posted. The authoriser is able to view but not amend an adjustment. The authorisor can only Authorise or Reject an amendment.
To Authorise or Reject an adjustment:
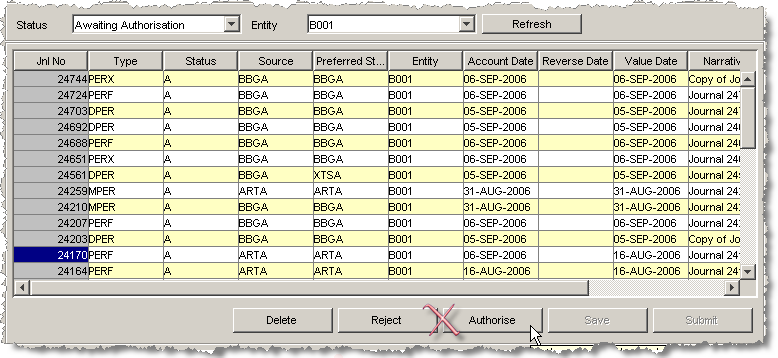
Find and select the adjustment you wish to authorise or reject by filtering or scrolling through the list.
Click on the Authorise or Reject button.
Note: If you reject the adjustment you will be required to add a comment in the narrative. The adjustment will be assigned a status of Failed.
Click on the confirmation dialog to complete the process.
The adjustment is re-validated before being posted.
... set a filter on the adjustment list
The Manual Adjustment screen will by default list all Journals at all statuses for all the Entities to which you are assigned.
This can create a long list.
The SLICE Desktop Manual Adjustments tool (Madj) allows you to filter this list making it easier to find a particular Journal.
To filter the list of journals:
Set the Entity filter via the Entity drop down menu.

Set the Status filter via the Status drop down menu.
The display will update with the filtered list of Journals.
!!! warning You do NOT need to click the Refresh button. If you do click the Refresh button you will loose any unsaved Journals.
... adjust local/base equivalent amounts
It is sometimes necessary to adjust the base and/or local currency amounts. This functionality is available for both the SLICE Desktop Manual Adjustments screen and the SLICE Excel upload template.
To adjust the base/local currency for a jounal type:
Ensure the Journal Tpe is set to PERX in the Journal Summary panel.
Enter the Local and Base amounts in the columns which are appended after the Narravtive column in the Journal Detail panel.

... use the desktop search dialogs
Many of the columns in the Journal Detail panel allow you to find entry values using a lookup dialog. The dialog can return a large set of data and you will often need to narrow the selection in order to locate the data you need.
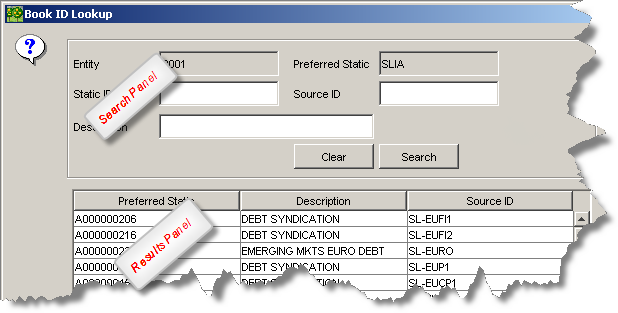
To use the desktop search dialog:
Double-click on the cell for which you need to enter a value.
This will open the dialog.
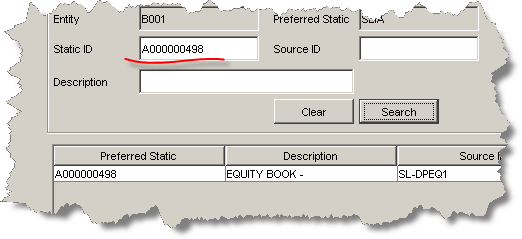
Enter a search term.
Enter an exact term, for instance the Static ID if you know it.
Alternatively enter a wildcard search using the % character.
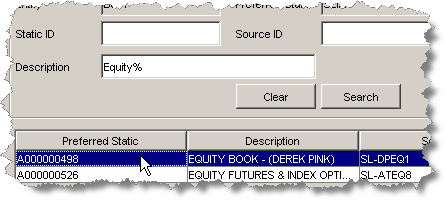
In this instance, we know the Book's description begins with " Equity ", and the % character matches any other character or string.
Click on the Search button.
SLICE will return all matching values.
Select the value you want.
Click the OK button.
The selected value will be entered into the cell.
Reference
The manual adjustment screen overview
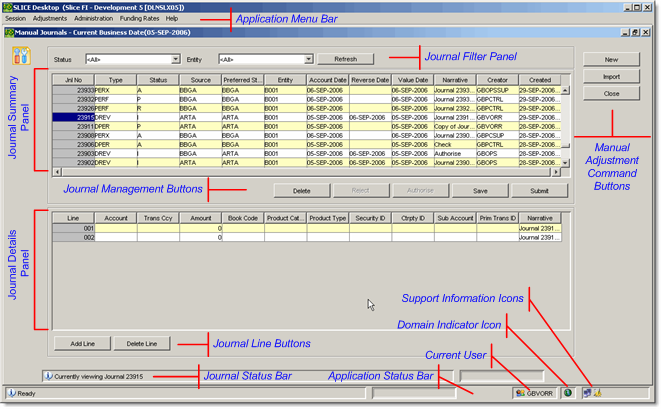
Manual adjustment screen field reference
Summary/header column reference
This table describes the columns in the Journal Summary panel in the SLICE Desktop Manual Adjustments screen as well as the Header section of the SLICE Manual Adjustments Excel template.
| Column Name | Description |
|---|---|
| Journal Number | Unique number for each manual adjustment |
| Type | Journal Type. For example, MREV, DREV, DPER etc. |
| Status | Either one of - (N) New (created but not yet saved), |
- (I) In Progress (saved but not yet validated),
- (F) Failed (failed validation),
- (A) Awaiting authorisation,
- (R) Rejected (not authorised), or
- (U) Unprocessed (authorised and are queued up awaiting the date roll before being posted).
- (P) Processed (validated and authorised),
| |Source system|Source system which the journal is associated.| |Preferred Static|Determines display of data in pick lists and search functions.| |Entity|The legal entity. Options available here are defined by authentication at log-on| |Effective Date / Account Date|Only business dates are available for effective / reversing / value date selection.| |Reverse Date|Reversing date for reverse type journals.| |Value Date|Value date.| |Narrative|Journal narrative applies to the whole journal. This field is mandatory within the journal summary & journal line level. Free format.| |Creator|User ID (GBId) of the user who entered the journal.| |Created|Date the journal was entered.|
Journals details column reference
This table describes the columns in the Journal Details panel in the SLICE Desktop Manual Adjustments screen as well as the SLICE Manual Adjustments Excel template.
| Column Name | Description |
|---|---|
| Line | Unique line number per line, automatically assigned by the system. |
| Account | The account code to post to(?) |
| Trans CCY | Currency of the transaction or event. |
| Amount | Adjustment amount. |
| Book Code | Book code. |
| Product Category | Product category. |
| Product Type | Product Type |
| Security ID | Code for the security. |
| Ctrpty ID | Displays the counterparty code for the selected sub-account. |
| Sub Account | Sub Account |
| Primary Tran Id | This is validated against the Trade Warehouse. Warning displayed if no match. If match is found then automatic population appears for book code, product category, sub-account, security id, product type and counterparty code. |
| Narrative | Mandatory field providing free form information regarding the adjustment. |
| Local Amount | Currency defined for the selected Entity. |
| Base Amount | Single global currency (eg EURO). |
Journal status reference
SLICE maintains journals with set status levels. These status levels have the following meaning:
| Status | Description |
|---|---|
| In Progress | Journals that have been saved to the database but not processed by the system. In other words, when the user clicks the ‘Save’ button, this status is assigned. With this status, journals can only be amended by the journal's creator. |
| Failed | Journals that have failed system validation at the point of authorisation. |
| Awaiting Authorisation | The intermediary status of journals which have been submitted but require authorisation by an approver. |
| Un-posted | Relates to forward manual adjustments that have not yet been posted to the sub-ledger [i.e. the Effective Date has not been reached]. |
| All | Relates to all journals within a functional group regardless of individual journal statuses. |
| New | A newly created journals, assigend when the user clicks the ‘New’ button. The journals exist in the GUI client only and are not saved to the database. A journal with this status will be lost when the GUI is closed without saving. |
| Processed | Journals that have been saved to the database and posted to the GL. When the user clicks the ‘Submit’ button (in the case of daily or monthly reversals) OR an approver clicks the ‘Authorise’ button for other journal types. The journals are read-only and cannot be amended. However, these journals can be copied. |
| Rejected | Journals that have been rejected by an approver [i.e. approver clicks the ‘Reject’ button]. |
Adjustment types
Adjustment Types determine the way in which an adjustment is processed within SLICE.
Codes for adjustment types
| Type | Code |
|---|---|
| Daily Reversing | DREV |
| Daily Permanent | DPER |
| Month-end Reversing | MREV |
| Month-end Permanent | MPER |
| Permanent Forward Date | PERF |
| Permanent Base and Local Currency Adjustment | PERX |
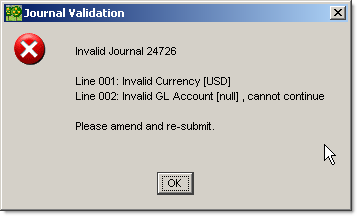
Interpreting validation messages
Validation occurs when journals are submitted and also when the journals are authorised. The checks which fail validation will be displayed on an error screen like this:
Validation rules
For all journals the following checks are performed:
- Journal balances to zero by transaction, base and local currency per book
- Journal balances to zero for postings to the internal nostro within currency within entity
- User is authorised to post to relevant entity
- Effective date is valid for the current business date
For all manual journal lines the following additional checks are performed:
- All mandatory journal attributes are populated with a valid value.
- If populated, Sub account, Product Category and Security ID hold a valid value
- All postings to the external nostro include a valid external nostro sub-account
The validation dialog indicates errors that can be manually corrected before resubmission. In other words the journal entry will not be completely rejected. The following errors are reported:
- Unbalanced journal
- Unbalanced internal nostro
- Effective Date not valid
- Reversing Date not valid
- Mandatory attribute missing
- Static Error